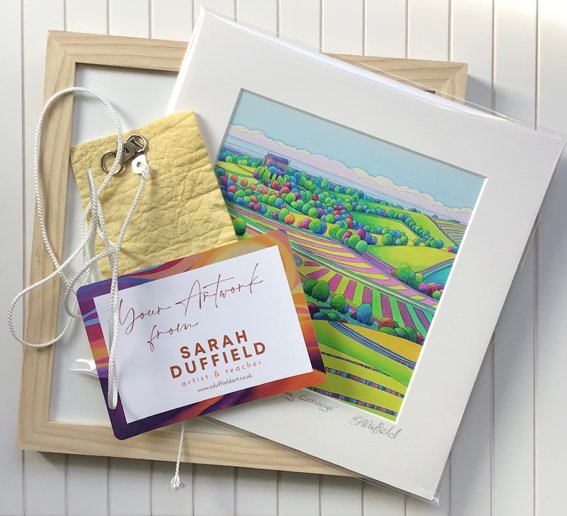
Framing your Sarah Duffield Mini Print.
We’ve all been there; bought a gorgeous item to gift, told ourselves our friend would definitely prefer a bottle of wine and kept the gift for ourselves.
It happens, a lot, especially when the gift is one of my beautiful, mounted, mini prints.
So, once you’ve answered the super easy “Should I keep it or Gift it?” question the only other question is “How to Frame it?” And the answer to that one really is very simple.
All of my mini prints arrive ready fixed in a standard mount (the board which surrounds your print) The mount fits perfectly into a 10x8 inch or 10x10 inch SHOP BOUGHT FRAME, it’s so easy.
All you have to do is nip off to the shop, choose a ready made frame that you love and a bottle of wine for your friend.
I’ve seen my mini prints in wooden frames, black frames, shabby chic frames, metallic, white and brightly coloured frames! They all look great.
Once I’ve picked out a frame I like to get everything I’m going to need together on my table before I put together my masterpiece.
My framing kit list includes; glass cleaner, lint free cloth, butter knife (I love a good butter knife for framing) screws, D rings, string and one of my stickers.
First up is glass cleaning. Using your butter knife very carefully prise open the clips that hold the back of your frame and glass in place (finger nails saved) Remove the glass and use your lint free cloth to clean both sides. Its super tempting to use kitchen roll for this bit but please don’t, kitchen roll will leave a million tiny pieces of white paper on your glass which will stay there and taunt you forever.
Spray your glass cleaner directly onto your cloth rather than the glass to prevent excess wetting and smearing.
Hold your glass up to the light to check for smudges, exclaim loudly at how dirty it still is and repeat the cleaning process again.
Lay the frame face down on the table and give the inside (the bit the glass sits on) a quick wipe with a dry cloth to remove any loose dust before carefully replacing the glass.
Remove your mini print from its protective wrapping and place face down on the glass. Your mini print comes with a backing board, place this in the frame as well, it should fit snugly and help reduce any dirt specks creeping back in.
Now, using one hand to stop your print and glass falling out of the frame, lift the entire ensemble up and check for any smudges or bits of fluff. Swear just a little bit under your breath, REMOVE everything, blow the dust away and pop it all back in again. Put the back of the frame in position using your butter knife to press the clips back down into place.
Next attach the sticker that comes with your mini print onto the back of your frame, the sticker has my name and website details on it so you’ll always know how to find me and when your friend sneaks a look at the back of your frame they’ll know how to find me as well.
If your frame doesn’t have holes or string already in place for hanging, lay glass side down on your table top and attach these now.
Finally, choose where you’d like to display your gorgeous artwork.
I’d suggest you hang your print out of direct sunlight and somewhere your friend can see and admire it when they come round to share their bottle of wine with you.
If you are a better person than me and have decided to gift a mini print feel free to share my mini print framing blog with them, you never know they may buy you a bottle of wine to say thank you.
S x


